If you’re tired of heavy braids that leave your scalp sore, I’ve got something that’ll change your mind. Bob knotless braids? They’re the sleek, lightweight game-changer I didn’t know I needed.
They look polished, feel comfortable, and honestly, the styling options are endless. But here’s the thing—getting them right takes more than just showing up to your appointment.
What Are Knotless Braids?

If you’ve been scrolling through social media and wondering what’s different about some braided styles, you’ve probably spotted knotless braids.
Unlike traditional braids that start with a knot at the root, these begin with loose hair that gradually incorporates extensions. This technique creates a seamless, natural-looking foundation that feels lighter on your scalp and looks incredibly polished from day one.
Knotless bobs offer an effortless, low-maintenance option that stays chic while requiring less tension at the roots.
Key Differences Between Knotless and Box Braids

While both styles offer protective benefits, knotless and box braids aren’t quite the same thing—and I’m here to break down exactly what sets them apart.
The main difference? Knotless braids start without that tight knot at the root, creating less tension on your scalp.
Box braids have that signature knot, which can feel heavier.
Knotless gives you that sleek, lightweight finish you’re craving.
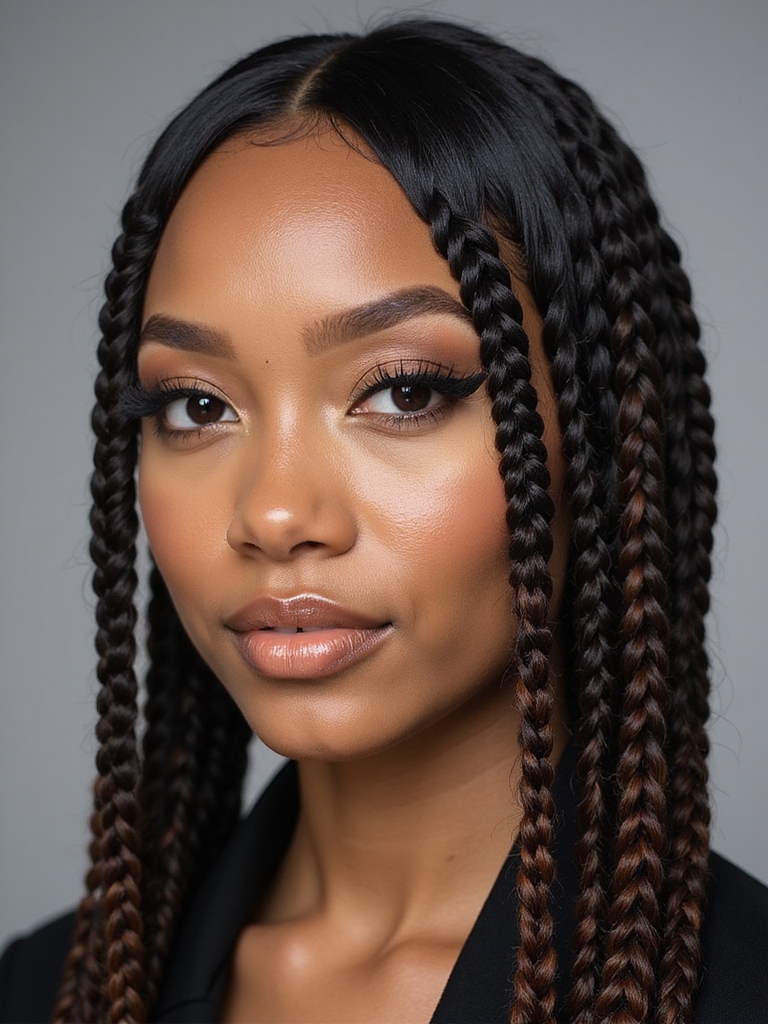
Bob Boho Knotless Braids often feature a more relaxed, lightweight finish that complements shorter lengths and adds effortless movement.
Why Choose Bob Knotless Braids?

Now that you understand why knotless braids reign supreme over traditional box braids, let’s talk about why the bob length specifically deserves a spot on your radar.
I’m telling you, bob knotless braids offer the perfect balance—they’re manageable, versatile, and incredibly chic.
You’ll love how they frame your face, require less maintenance, and let your scalp breathe while keeping that polished, put-together vibe.
They also give you a chic short bob that’s effortless to style and ideal for everyday wear.
Hair Preparation Before Getting Knotless Braids

Before you book that appointment for your bob knotless braids, I’ve got to be honest—the prep work you do beforehand makes all the difference in how long they last and how healthy your hair stays underneath.
I always deep condition my hair the week before, detangle thoroughly, and keep my scalp moisturized. Clean, healthy hair creates the perfect foundation for braids that’ll truly shine. Bob braids can be styled in many ways and are known for their lightweight finish.
Choosing the Right Length and Style for Your Bob

When you’re considering a knotless braid bob, I want you to think about your face shape first—certain lengths and angles will flatter your features way more than others.
You’ll also need to be honest with yourself about your lifestyle because a sleek, lightweight finish requires consistent maintenance to keep it looking fresh.
Getting these two factors right upfront means you’ll actually enjoy wearing your braids instead of feeling frustrated with them.
A quick weave bob can offer a similar sleek silhouette with less tension when installed correctly, so consider Quick Weave Bob as an alternative to knotless braids.
Face Shape Considerations
Since your face shape plays a crucial role in how a hairstyle frames your features, I’ve found that selecting the right bob length and style for knotless braids can totally transform your look.
Round faces benefit from longer bobs that elongate, while angular faces rock shorter styles beautifully. Oval faces? You’ve got lucky—nearly any length works.
I always match the style to your unique features for maximum impact.
Lifestyle and Maintenance Needs
Your lifestyle’s got to match your knotless braid length if you want to actually enjoy wearing them.
I’ve found that shorter bobs work best if you’re active or frequently traveling—they’re easier to maintain and less prone to frizz. Longer styles need more commitment but offer versatility.
Consider your daily routine, climate, and how much time you’ll dedicate to care before deciding.
The Installation Process Explained

As I’ve walked through countless installation appointments, I’ve found that understanding the process beforehand makes all the difference in your experience.
Here’s what you’ll experience:
- Your stylist sections your hair meticulously
- Each braid gets fed without knots at the base
- The lightweight technique minimizes tension
- Installation takes 2-4 hours depending on length
You’ll leave feeling fabulous and confident!
How to Achieve a Sleek Finish

I’ve found that achieving that coveted sleek finish really comes down to three essential steps: prepping your scalp with moisture, applying gel and edge control strategically, and sealing everything down with oil.
You’ll notice the difference immediately when you take time to hydrate your scalp before braiding—it makes the entire process smoother and keeps flyaways at bay.
Let me break down exactly how to master each of these techniques so your knotless braids look polished from day one.
Moisturizing Your Scalp First
A properly moisturized scalp is absolutely essential if you’re after that coveted sleek finish with knotless braids.
I’ve learned that prep work makes all the difference:
- Apply a hydrating scalp oil or moisturizer
- Let it sit for at least 30 minutes
- Gently massage it into your roots
- Use lightweight products to avoid buildup
Trust me, this step transforms your entire braiding experience and keeps that sleek look lasting longer.
Using Gel and Edge Control
Once you’ve got that scalp moisturized and ready to go, the next game-changer is picking the right gel and edge control products.
I’m telling you, a quality gel keeps everything in place without flaking or crunchiness.
You’ll want something lightweight that doesn’t weigh your braids down.
Apply it smoothly along your edges for that polished, sleek look that’ll have everyone asking what your secret is.
Sealing Ends With Oil
Protecting those braid ends with oil is what’ll truly lock in that sleek, lightweight finish you’re after. I recommend sealing yours with:
- Lightweight oils like argan or jojoba
- A small applicator brush for precision
- Smooth, downward strokes along each end
- Quick touch-ups every few days
This keeps your ends sealed and prevents fraying while maintaining that polished look you love.
Maintaining Lightweight Braids Throughout Wear

If you’ve invested time in getting your knotless braids installed, you’ll want to keep that sleek, feather-light feel for as long as possible.
I recommend sleeping on a silk pillowcase to reduce friction and frizz. Refresh your edges weekly with lightweight gel, and spritz your braids with water and leave-in conditioner every few days. These simple habits’ll keep everything looking fresh and feeling light.
Styling Options for Your Bob Knotless Braids

Your bob knotless braids open up a world of styling possibilities that’ll keep you looking fresh between maintenance days.
Try these looks:
- Half-up buns for effortless elegance
- Sleek ponytails that highlight your face
- Side parts for dimension and movement
- Accessorized styles with clips and scarves
Mix and match these options throughout your wear to maximize versatility without compromising your braids’ integrity.
How Long Do Knotless Braids Last?

I’ve found that knotless braids typically last four to six weeks, though how long yours’ll hold up really depends on your maintenance routine and how active you are.
You’ll want to watch for telltale signs of wear like frizz at the roots, loosening strands, and thinning sections, which tell you it’s time for a refresh.
Keeping your scalp moisturized and protecting your braids at night can seriously extend their lifespan and keep that sleek finish looking fresh.
Duration and Maintenance Factors
Because knotless braids distribute tension more evenly across your scalp, they’ll typically last between 6 to 8 weeks with proper care—though I’ve seen them hold up beautifully for up to 10 weeks if you’re diligent about maintenance.
Keep yours looking fresh by:
- Moisturizing your scalp weekly
- Sleeping in a silk bonnet
- Avoiding excessive tension during styling
- Getting timely touch-ups on new growth
These habits genuinely extend your braids’ lifespan!
Signs of Wear Recognition
Even with the best maintenance routine, knotless braids will eventually show signs that it’s time for a refresh.
You’ll notice frizz increasing around your edges, loose strands popping out, and potential matting at the roots.
If your braids feel heavy or you’re experiencing scalp tenderness, that’s your cue.
Don’t wait—removing them promptly prevents damage and keeps your hair healthy.
Scalp Care While Wearing Knotless Braids

Your scalp’s health can honestly make or break your entire braiding experience, and I’m not exaggerating.
I’ve learned that keeping your scalp happy requires consistent care:
- Moisturize regularly with lightweight oils
- Cleanse gently every few days
- Avoid excessive tension near roots
- Give your scalp breaks between installations
Trust me, you’ll notice the difference immediately.
Common Mistakes to Avoid

I’ve learned that two mistakes can really mess up your knotless braid experience: pulling the braids way too tight and skipping out on scalp moisture.
When you crank the tension, you’re literally setting yourself up for hair breakage and scalp irritation that’ll have you regretting it within days.
Your scalp’s also thirsty during this style, so neglecting to moisturize it regularly is basically asking for dryness, itching, and potential damage to your natural hair.
Tension Too Tight
When you’re braiding, it’s tempting to pull each section tight so everything stays in place, but that’s actually one of the quickest ways to damage your hair and scalp.
Here’s what happens:
- Hair breakage and thinning
- Scalp irritation and inflammation
- Uncomfortable tension headaches
- Premature loosening of braids
I’ve learned that gentle, consistent pressure works best. Your braids’ll last longer and your hair stays healthier!
Neglecting Scalp Moisturizing
Beyond protecting your hair from tension damage, there’s another critical area that needs just as much attention: your scalp.
I’ve learned that knotless braids can dry out your scalp if you’re not moisturizing regularly. You’ll want to apply lightweight oils or hydrating products every few days.
Believe me, keeping your scalp nourished prevents itching, flaking, and keeps your braids looking fresh longer.
Products That Work Best for Knotless Braids

Since knotless braids require a gentler approach than traditional braiding methods, you’ll want to stock up on products that won’t weigh down your hair or cause breakage.
I’d recommend:
- Lightweight leave-in conditioners
- Sulfate-free shampoos
- Natural oils like jojoba or almond
- Moisturizing sprays
These essentials keep your braids looking fresh while protecting your edges and scalp throughout your style’s lifespan.
Removing Your Braids Safely and Properly

Taking down your knotless braids requires just as much care as putting them in, and I can’t stress this enough—rushing through removal is where most damage happens.
I recommend using a clarifying shampoo and deep conditioning treatment beforehand.
Gently unravel each braid slowly, detangling as you go.
Never pull or yank.
This patience protects your natural hair from breakage and keeps your scalp healthy for your next style.
Aftercare Tips for Healthy Hair Growth

Once you’ve removed your braids, the real work begins—and I’m here to tell you it’s absolutely worth the effort. Your hair needs some serious TLC:
- Deep condition weekly to restore moisture
- Moisturize your scalp with lightweight oils
- Minimize heat styling for at least two weeks
- Trim split ends to promote healthy growth
You’ll love how your hair bounces back!
I’ve got to say—bob knotless braids are an absolute game-changer for your protective styling routine. You’re getting that gorgeous, polished look without the scalp tension, and honestly, the versatility is unbeatable.
With the right prep, products, and care, you’ll rock these braids for weeks while your hair stays healthy underneath. You’ve totally got this!