I’ll be honest—when you first hear “shag,” you probably picture the messy, undone looks from the ’70s. But here’s the thing: modern shags on straight hair are completely different.
They’re sharp, intentional, and honestly? They’re a game-changer if you want movement without the chaos. Want to know what actually separates them from their vintage cousins?
What Makes a Modern Shag Different From Vintage Versions

While the ’70s shag was all about maximum volume and dramatic layering, today’s versions are way more refined. I’ve noticed modern shags focus on clean lines and subtle texture instead of wild, choppy chaos.
We’re talking strategic layers that enhance your natural straight hair without creating that disheveled look. It’s all about sophistication now—structured yet effortlessly cool. Modern shags emphasize texture and movement to keep styles contemporary and wearable.
Understanding the Anatomy of a Shag Cut

Since you’re ready to commit to a shag, let me break down exactly what makes one work.
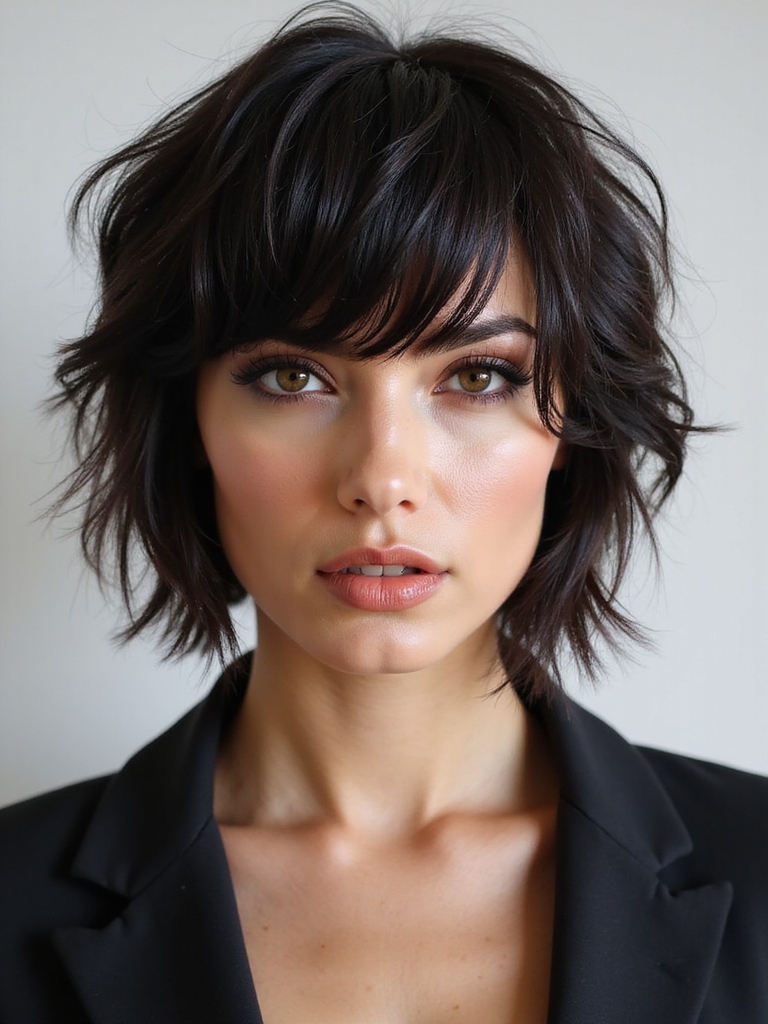
A shag’s got three essential layers: shorter, textured layers on top that create volume and movement, longer underneath sections for length, and choppy, disconnected pieces throughout.
This contrast between short and long is what gives you that signature shag movement and dimension you’re after.
A modern shag often includes stylish bangs to frame the face and enhance the cut’s effortless vibe.
Why Straight Hair Is Perfect for Clean-Edge Shags

Now that you understand the structure of a shag, here’s the thing—straight hair is basically the ideal canvas for this cut.
You’ll see those layered edges pop beautifully without frizz or texture getting in the way. The clean lines speak for themselves, making your shag look intentional and polished rather than accidentally messy.
Modern shags emphasize clean-edge layering to refresh classic retro styling with contemporary polish.
How Layers Create Movement Without Sacrificing Definition

I’ll show you how I create movement in straight hair without losing those crisp edges you’re after. Layering techniques are your secret weapon—they’ll add dimension and flow while maintaining the sharp definition that makes shags so striking.
When I strategically place layers, I’m not just adding texture; I’m directing how your hair moves while keeping every line clean and intentional. This approach is especially effective for achieving an Effortless Blonde Shag that emphasizes modern texture and movement.
Layering Techniques for Movement
Through strategic layering, you’ll reveal the secret to creating dynamic movement in straight hair without compromising the crisp definition that makes shag cuts so striking.
I’ve found that varying layer depths and angles encourages natural texture and flow.
Shorter layers at the crown add lift, while longer pieces frame your face beautifully.
This approach gives you that effortless, lived-in vibe everyone’s after.
The shag’s signature silhouette is often enhanced by adding curtain bangs that blend seamlessly with the layers.
Maintaining Sharp, Clean Lines
While layering gives you that gorgeous movement, the real magic happens when you keep those lines sharp and intentional.
I’ve found that precision trimming prevents that wispy, unkempt feeling. You’ll want regular trims every four to six weeks to maintain definition.
Blunt edges at layer endpoints create that polished contrast against softer interior layers, giving you movement that still looks deliberate and controlled.
The Importance of Sharp, Intentional Lines

I’ll share something I’ve learned about shag cuts on straight hair: precision truly defines modern style, and you’ll notice how clean lines frame your face in ways that feel intentional rather than accidental.
When I get a sharp cut with purposeful angles, it doesn’t just look polished—it actually enhances my hair’s natural texture instead of fighting against it. That’s the magic of intentional design; every line serves a purpose.
Precision Defines Modern Style
Sharp lines aren’t just aesthetic—they’re the backbone of what makes a modern shag cut actually work. I’ve noticed that when your stylist nails those crisp edges, it elevates the entire look.
You’re not getting a choppy mess; you’re getting intentional texture that actually flatters your face. That’s precision. That’s what separates a trendy shag from a grown-out disaster.
Clean Lines Frame Face
Throughout a shag cut on straight hair, you’ll notice that clean lines aren’t just nice-to-haves—they’re absolutely essential.
Sharp edges define your face and elevate the entire look.
I’m talking about:
- Crisp perimeter lines that frame your features
- Defined layers that catch light beautifully
- Precise angles that enhance your bone structure
- Intentional separation that prevents a messy appearance
These details transform a shag from choppy to chic.
Intentional Cuts Enhance Texture
Because texture‘s what makes a shag cut sing on straight hair, you’ve gotta understand that every snip serves a purpose.
I’m talking razor-sharp layers that create movement and dimension. Your stylist strategically cuts at angles—not randomly hacking away. These deliberate cuts break up flatness, add volume where you need it, and give your straight hair that coveted lived-in edge.
Finding the Right Length for Your Face Shape

When you’re considering a shag cut for straight hair, the length you choose can make all the difference in how flattering it’ll look on you.
- Longer lengths elongate round faces beautifully
- Shorter cuts add dimension to angular features
- Chin-length styles balance wider face shapes
- Layered ends flatter heart-shaped faces
I’ve found that working with a stylist who understands your face shape guarantees you’ll love your cut.
Texture and Taper Techniques for Polished Results

I’m excited to show you how texturizing and tapering can transform your shag from basic to polished.
We’ll explore strategic layering that adds movement and dimension, plus the nape tapering techniques that give your cut that sharp, intentional finish.
I’ll also walk you through the best tools and methods to create texture that’ll make your straight hair look effortlessly styled.
Layering for Dimension
Once you’ve nailed the basic shag structure, layering’s where the magic happens—and it’s honestly what separates a flat, shapeless cut from one that’s got serious movement and personality.
- Face-framing layers that flatter your features instantly
- Choppy texture creating that effortless, undone vibe
- Strategic length variation for natural bounce
- Depth that photographs beautifully from every angle
Tapering the Nape Area
Here’s where your shag truly earns its polished edge—the nape area‘s where you’ll transform potential wisp-iness into intentional sophistication. I’ll use point-cutting techniques to create a gradual taper that hugs the neck beautifully.
You’ll get clean lines without that choppy, disconnected feeling. This precise tapering elevates your entire look, giving you that effortlessly refined aesthetic.
Texturizing Techniques and Tools
Now that you’ve nailed that polished nape, it’s time to add dimension where it matters most—throughout the mid-lengths and ends.
I’m obsessed with these game-changing techniques:
- Point-cutting for choppy, lived-in texture
- Razor work that creates movement
- Thinning shears for effortless layers
- Texturizing scissors for dynamic separation
You’ll love how these tools transform straight hair into a shaggy masterpiece that feels intentional and undeniably cool.
Working With Your Stylist: What to Communicate

How can you make sure your stylist nails that shag cut you’re envisioning? Bring photos of styles you love—multiple angles matter.
Describe your hair’s texture honestly and discuss your daily styling commitment.
Ask about maintenance frequency.
Don’t shy away from mentioning what you’ve disliked in past cuts.
Clear communication prevents costly mistakes and guarantees you’re both on the same page.
Styling Products That Enhance Clean Edges

Once you’ve nailed down the perfect cut with your stylist, the real magic happens when you’ve got the right products in your arsenal.
I’m talking about game-changers that’ll keep those edges razor-sharp:
- Texturizing spray for effortless definition
- Lightweight pomade for precision styling
- Volumizing mousse for movement and control
- Edge control gel for polished finishes
You’ll notice how these products transform your shag from good to absolutely stunning.
Daily Styling Routines for Straight Hair Shags

Getting your shag to look its best every single day doesn’t require a complicated routine—I’ve found that keeping things simple actually works better.
I blow-dry with a round brush to enhance texture, then use a light texturizing spray for separation.
A quick tousle with my fingers finishes it. That’s honestly it.
You’ll love how effortless your shag becomes.
Heat Styling Tools That Maintain Precision

The right heat tools make all the difference when you’re styling a shag on straight hair. I’ve found these essentials keep your precision intact:
- Flat irons with thin plates – they glide through layers without crushing texture
- Round brushes – perfect for flipping out those choppy ends
- Blow dryers with concentrator nozzles – they direct airflow exactly where you need it
- Curling irons with tapered barrels – they create movement without frizz
You’ll nail that effortless, polished look every time.
How Often You’ll Need Maintenance Appointments

Shags demand regular trims every 4-6 weeks if you’re serious about keeping that sharp, textured look intact.
I’ll be honest—skipping appointments lets those layers lose their definition fast. You’ll notice the edges get shaggy rather than intentional.
Between visits, I recommend dry shampoo to refresh your style.
Staying consistent with maintenance keeps you looking polished and prevents that grown-out, unkempt appearance.
Preventing That Messy, Overgrown Appearance

I’ve found that keeping your shag cut looking fresh involves sticking to a regular trim schedule—I typically book appointments every 4-6 weeks to maintain those sharp layers and prevent that unkempt vibe.
The beauty of layering is that it naturally resists bulk buildup, so you won’t wake up one day wondering when your cut got so heavy.
Between salon visits, I style strategically with texturizing products and a bit of blow-dry work to keep everything looking intentional rather than neglected.
Regular Trim Schedule Maintenance
You’ll want to commit to trimming your shag every 4-6 weeks if you’re serious about keeping that fresh, intentional look—and honestly, it’s the difference between effortlessly cool and just plain unkempt.
Here’s what regular maintenance gives you:
- Crisp layers that actually frame your face
- That coveted lived-in texture without the neglected vibe
- Prevents scraggly ends from ruining your whole aesthetic
- Keeps your cut looking intentional, not accidental
Layering Prevents Bulk Growth
Strategic layering does something pretty magical—it actually works against that bulky, shapeless growth that happens between cuts.
I’ve found that well-placed layers create movement and texture, so your hair looks intentionally tousled rather than unkempt. The shorter pieces on top keep things light while longer sections underneath maintain length.
This balance means you’ll stretch those weeks between salon visits without sacrificing your shag’s edgy appeal.
Styling Between Professional Cuts
- Scrunch your layers with a texturizing spray
- Adopt air-drying for natural movement
- Use a diffuser on low heat
- Refresh with dry shampoo for volume
You’ll maintain that effortless edge without the overgrown mess.
Adapting the Shag to Different Hair Textures

Because not all hair’s created equal, the shag cut needs tweaking depending on what you’re working with.
If you’ve got wavy hair, layers work magic—they enhance your natural texture beautifully.
For curly hair, I’d suggest longer layers that prevent too much volume at the crown.
Straight hair? You’ll want shorter, choppy layers for that signature movement and dimension.
Transitioning From Other Cuts to Your New Shag

Moving into a shag from your current cut doesn’t have to feel like jumping off a cliff. I’ve found that gradual shifts work best:
- Schedule consultations before committing
- Start with subtle layers if you’re nervous
- Trust your stylist’s expertise
- Welcome the awkward growth phase
You’ll adjust faster than you think, and that textured freedom? Totally worth it.
You’ve got this! A clean-edge shag on straight hair isn’t just a throwback—it’s a smart, modern choice that actually works with your hair type. You’ll love how those intentional layers give you movement and dimension without the fuss.
Sure, you’ll need regular trims to keep those sharp lines crisp, but believe me, the payoff’s totally worth it. Go rock that polished, deliberate shag.