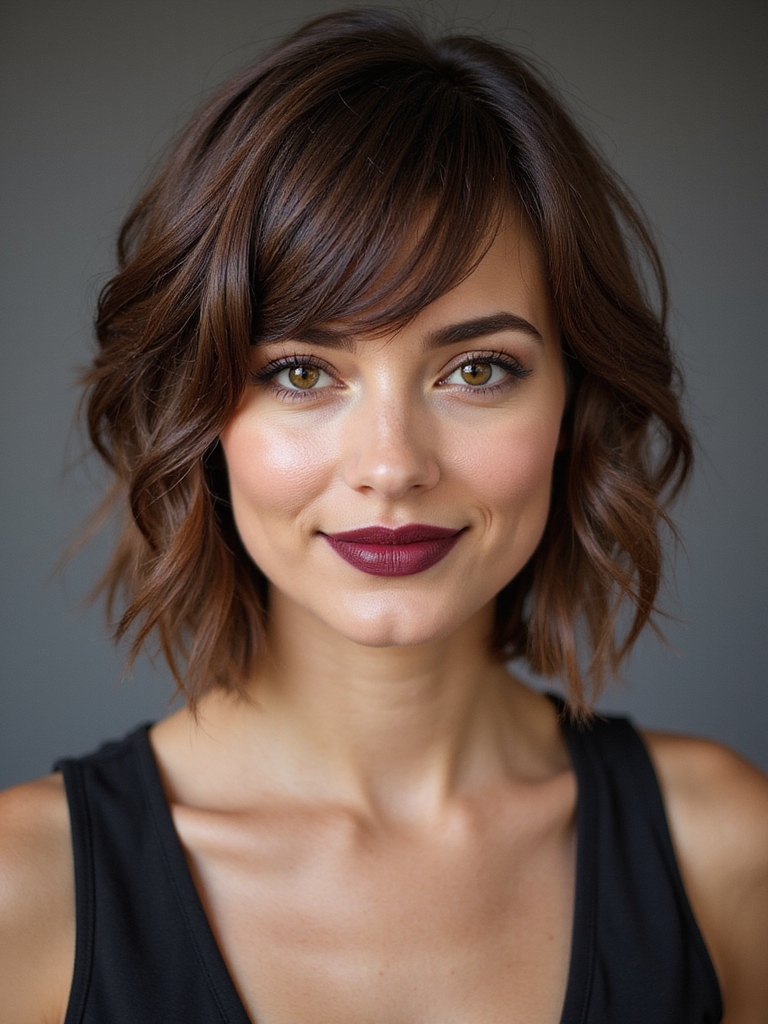
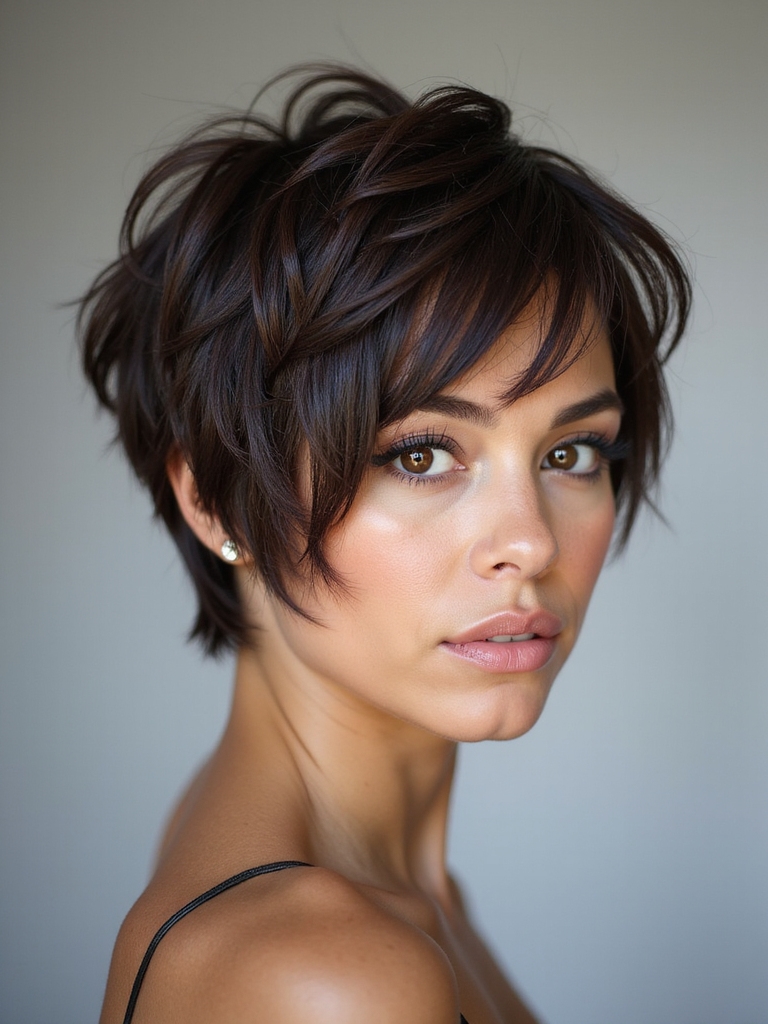
If you’re tired of flat, lifeless hair that won’t cooperate, I’ve got news for you: a short curly shag with bangs might be your game-changer.
This cut isn’t just about looking good—it’s about welcoming texture and movement that actually works with your natural curl pattern instead of against it. But here’s the thing: getting it right takes more than just finding the right stylist.
Understanding the Shag Cut and Its Modern Evolution

If you’re nostalgic for the ’70s or craving a fresh, textured look, the shag cut is having a major moment right now. I’m thrilled by how it’s evolved!
Today’s version ditches the heavy layers for something more refined and face-flattering. It works beautifully with curls and bangs, creating movement and personality.
Modern shags celebrate your natural texture while keeping things chic and manageable. The updated approach often centers on a Shag Cut that enhances texture without overwhelming the face.
Why Curly Hair Is Perfect for the Shag Style

Curly hair and shags are honestly a match made in heaven, and I’m here to tell you why!
The layered structure works with your natural texture instead of against it. Your curls get definition and movement without fighting for shape.
You’ll experience amazing volume and dimension that straight hair simply can’t achieve. Plus, styling becomes effortless—your curls do half the work for you!
Effortless styling is especially achievable with the Effortless Shag because its layers enhance curl shape and bounce.
The Role of Bangs in Framing Your Face

Now, let’s talk about what really makes a short curly shag pop—the bangs! They’re game-changers for framing your face.
Here’s why I love them:
- Softens your forehead and highlights your eyes
- Adds instant texture and movement to your style
- Creates flattering angles that complement any face shape
- Gives you versatility—wear them wispy or bold
Your bangs transform the entire look! A well-cut shag enhances natural curl texture and movement for effortless volume.
Different Types of Bangs to Consider

Since you’re ready to commit to bangs, let me walk you through the options—because not all bangs are created equal!
You’ve got wispy curtain bangs for that effortless vibe, blunt bangs for drama, and side-swept styles for versatility.
With curls, I’d recommend longer bangs that work with your texture rather than against it.
They’ll bounce beautifully and frame your face without fighting your natural wave!
Curly shags are especially flattering because of their medium-length layers, which add movement and shape.
Layering Techniques That Maximize Volume and Bounce

I’ve found that strategic cutting is the game-changer for maximizing volume in your curly shag—it’s all about creating texture through intentional techniques like point-cutting, which really brings out your curl’s natural definition.
Angled layers are your secret weapon too; they’re what give that bouncy, movement-filled look that makes a shag actually shag. When you combine these layering methods, you’re not just cutting hair—you’re sculpting a style that works with your curls, not against them.
Modern shag techniques also often incorporate angled layers to enhance movement and bounce.
Strategic Cutting for Texture
The magic behind a short curly shag‘s irresistible bounce and volume lies in how you layer it, and I’m thrilled to walk you through the techniques that’ll transform your cuts.
- Point-cut ends for textured separation
- Undercut sections for movement
- Angle layers toward the face
- Texturize bangs for dimension
These strategic cuts work together, giving your curls room to breathe and play!
Point-Cutting Enhances Curl Definition
Point-cutting transforms how your curls catch light and move, and it’s honestly one of my favorite techniques to master.
I strategically point-cut into each curl section, removing weight precisely where it matters.
This creates individual curl definition instead of clumpy, dense waves.
Your curls’ll bounce separately, giving you that coveted texture and dimension that makes this shag absolutely pop.
Angled Layers Boost Movement
Layering at strategic angles is where your shag truly comes alive—and it’s honestly the secret weapon for maximum movement and volume.
I’m telling you, here’s what makes it work:
- Shorter layers on top create lift
- Longer underneath layers add dimension
- Angled cuts follow your curl pattern
- Graduated lengths boost natural bounce
This combo? Chef’s kiss for that effortless, lived-in vibe you’re after.
Styling Products That Enhance Your Natural Curl Pattern

I’ve found that the right styling products can totally transform your curls, and I’m excited to share what’s worked best for me.
Curl-defining creams and gels are my go-to for sculpting those gorgeous ringlets, while leave-in conditioners keep everything defined without the crunch.
Lightweight oils and serums are the cherry on top—they add shine and tame frizz without weighing down your natural texture.
Curl-Defining Creams and Gels
Once you’ve got your shag cut just right, it’s time to talk about the products that’ll make your curls absolutely sing.
I’m obsessed with these game-changers:
- Lightweight curl creams that won’t weigh you down
- Anti-frizz gels for definition and hold
- Leave-in conditioners that boost moisture
- Styling lotions that enhance natural texture
Your curls’ll thank you!
Leave-In Conditioners for Definition
Leave-in conditioners are where the magic really happens for curly shags—they’re the unsung heroes that’ll transform your texture from frizzy to fabulous.
I’m obsessed with how they lock in moisture while defining each curl individually. They’re your secret weapon for bouncy, touchable curls that last all day.
Apply them to damp hair, and you’ve got the foundation for stunning definition.
Lightweight Oils and Serums
While leave-in conditioners lay down that essential moisture foundation, lightweight oils and serums take your curl game to the next level—they’re the finishing touches that’ll make your shag absolutely shine.
I’m talking about:
- Argan oil for glossy definition
- Coconut serum for frizz control
- Jojoba oil for lightweight hydration
- Marula oil for bounce and shine
These products won’t weigh down your curls; they’ll amplify your natural texture beautifully.
Daily Styling Methods for a Tousled Look

Getting that effortlessly undone, piece-y vibe doesn’t require much effort—I promise!
I simply scrunch my damp curls with a curl-defining cream, then flip my head upside down while blow-drying.
Once dry, I’ll tousle everything with my fingers, separating strands for that lived-in texture.
On lazy days, I spritz texturizing spray and call it done. That’s it!
How to Define Your Curls for a Polished Finish

I’m thrilled to show you how I’ve transformed my shag from cute-but-messy to genuinely polished by mastering three game-changing techniques. First, I’ll walk you through selecting products that’ll actually work with your curl pattern instead of against it, then we’ll tackle the scrunching and diffusing method that brings out your curls’ best texture.
Finally, I’ll share how I’ve learned to enhance my natural curl pattern so every ringlet works in harmony for that effortlessly refined finish you’re after.
Choosing the Right Products
The secret to nailing that polished, defined curl look? You’ve gotta stock your bathroom with the right arsenal!
I’m talking:
- Curl-defining cream
- Lightweight leave-in conditioner
- Anti-frizz serum
- Flexible hold gel
These products work together to enhance your natural texture, tame flyaways, and keep those bangs perfectly framed.
Believe me—your curls’ll thank you!
Scrunching and Diffusing Technique
Now that you’ve got your products lined up, it’s time to put ’em to work! I scrunch my curls upward, encouraging them to coil naturally.
Then I use a diffuser attachment on my blow dryer, moving it gently through my hair without disrupting the curl pattern. This technique locks in definition while creating that enviable bounce and polish you’re after!
Enhancing Natural Curl Pattern
Once you’ve got that bounce locked in, it’s time to really make your curls shine! I’m talking about defining those gorgeous waves with precision.
Here’s how I lock in curl perfection:
- Apply curl-defining cream to damp hair
- Finger-coil sections for extra definition
- Use a lightweight gel for hold
- Air-dry or diffuse for bouncy results
Your shag’s gonna look absolutely stunning!
Maintenance and Trimming Schedule for Shag Longevity

Keep your short curly shag looking fresh by visiting your stylist every 4-6 weeks—I can’t stress this enough if you want that signature texture and volume to stick around.
Regular trims prevent those scraggly ends from weighing down your curls.
Between appointments, use a hydrating leave-in conditioner to keep your bangs bouncy and your layers defined.
Believe me, this schedule keeps your shag absolutely stunning!
Adapting the Cut to Your Specific Face Shape

While every face’s got its own unique features, I’ve found that tailoring your short curly shag to your specific shape is what transforms a cute haircut into your signature look.
- Round faces benefit from longer layers that elongate
- Square jaws need softening through textured bangs
- Oval shapes rock any shag variation beautifully
- Heart-shaped faces thrive with chin-length layers
You’ll love how personalization elevates your style!
Color Ideas That Complement the Shag With Bangs

How do you really make a short curly shag pop? Color’s your secret weapon! I’d suggest warm honey blondes that enhance natural texture, or rich chocolate browns for depth.
Considering your skin tone matters too—cool undertones shine with ash or platinum, while warm complexions glow with caramel or copper. Don’t fear experimenting with subtle highlights or lowlights for dimension and movement!
The Difference Between Short, Medium, and Extra-Short Shags

When you’re deciding on your shag length, I’ve found that understanding the differences between short, medium, and extra-short versions really helps you nail your ideal look.
Each length brings its own personality—short shags give you that classic, face-framing vibe, while medium shags offer more movement and styling flexibility.
Extra-short shags? They’re your ticket to a bold, low-maintenance cut that still delivers serious texture and personality.
Short Shag Length Characteristics
Because shag haircuts come in so many variations, understanding the length categories’ll help you nail down exactly what you’re after.
- Extra-short shags sit above your ears with serious edge
- Short shags hit your chin, offering versatility and movement
- Medium shags reach your shoulders with layered texture
- Longer shags provide dramatic volume and flowing dimension
Each length transforms your look differently!
Medium Shag Styling Differences
Now that you’ve got the length breakdown down, let’s talk about how styling shifts as your shag grows. Medium shags give you more versatility than their shorter cousins. You’ll notice you’ve got enough length to scrunch for definition or let waves fall naturally.
The layers really start showing personality here, and you’re getting serious movement without sacrificing that edgy, textured vibe.
Extra-Short Shag Versatility Options
If you’re thinking shorter’s better, an extra-short shag might just be your sweet spot.
Here’s what makes it fantastic:
- Minimal styling time—just shake and go
- Maximum texture visibility for curl definition
- Edgy, modern vibe that turns heads
- Perfect for showing off your facial features
You’ll love how low-maintenance yet bold this cut feels!
Celebrity Inspiration and Real-Life Examples

Ever wonder who’s rocking the short curly shag with bangs? Zendaya’s worn this edgy look with serious style, and it’s totally inspiring.
You’ll notice how the texture bounces with movement—that’s the magic.
I’m telling you, this cut works on different face shapes and hair types.
Check out photos of these celebrities sporting it, then bring those images to your stylist for your perfect match.
Common Mistakes to Avoid When Getting a Shag

Just because you’ve got inspo photos doesn’t mean you’re ready to book that appointment—there’s actually a lot that can go wrong with a shag if you’re not careful.
- Choosing the wrong stylist
- Ignoring your hair texture
- Skipping the maintenance talk
- Expecting zero styling effort
Trust me, these missteps’ll leave you regretting your decision faster than you can say “grow it out.”
Tips for Transitioning to This Cut if You’re New to Shags

Making the leap from a blunt bob or straight layers to a shag can feel like you’re diving headfirst into the deep end—but I’m here to tell you it’s totally doable.
Start with a stylist who specializes in shags; they’ll customize the cut to complement your curl pattern. Celebrate the texture, invest in quality curl products, and give yourself permission to rock some beautifully imperfect bedhead vibes!
You’ve got all the insider secrets now—it’s time to rock that curly shag! If you’re going full wispy bangs or keeping things subtle, this cut’s gonna transform how you feel about your curls.
Welcome the bounce, commit to those regular trims, and don’t be afraid to experiment with styling products. Your hair’s about to become your favorite accessory, and honestly, you’re gonna turn heads everywhere you go!